The Garden Post
How to Start a Raised Bed Garden
There is a lot to love about raised bed gardening. No more having to kneel or bend over, soil warms up faster and allows for earlier planting, you have complete control over soil composition and more! Here are some tips and tricks to start you own raised bed!
- Select Your Location– Location depends on what you’re planning on growing. Vegetable and herb garden require full sun, so you will need a location that gets at least 6 hours of full sun a day. If you’re planning on growing shade perennials or annuals, select a location that gets morning sun and afternoon shade or dappled sunlight. If you can, select a location near a spigot for easy watering.
- Dimensions & Materials – Once you’ve selected your location, it’s time to design your bed!
-
- The easiest option, especially for beginners, is to purchase a prefabricated raised bed. These beds are generally small, come in different materials, are easy to assemble and even easier to manage.
- If you are planning on building you own raised bed, here’s the basics:
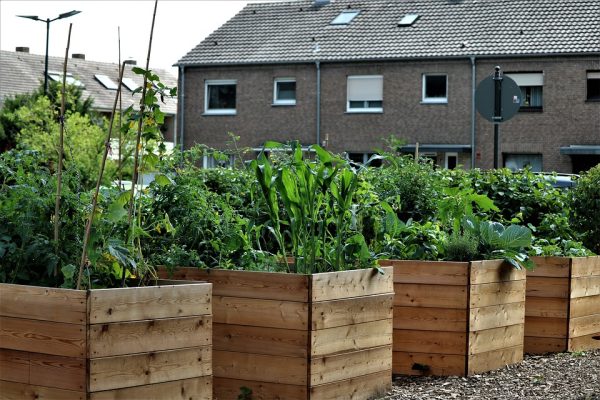
- The optimal width for raised beds is 4 feet. Any wider and it can be difficult to reach plants in the center.
- The average depth of raised garden beds is 12 to 18 inches, however you can go deeper (the deeper your beds, the more soil you will need to fill them). It’s not advised to have your beds any less than 12 inches as root development may be impacted.
- Length is the most variable aspect and is fully dependent on your wants and needs. If you have the space for a 10’ long bed, go for it! Low on space? Try a smaller 4’ by 4’ bed.
- When it comes to materials, wood (particularly cedar) is the most popular, but stone, pavers, plastic and recycled materials are all viable options. Unless it’s been treated, avoid metal as it can rust and break down when exposed to the elements.
- Soil – We recommend Coast of Maine Raised Bed Soil for an easy and nutrient packed way of filling your raised beds.
-
- If you want to create your own raised bed soil, a good recipe is 50% top soil, 40% compost (like Coast of Maine Lobster Compost) and the remaining 10% a mix of vermiculite, peat moss and earthworm castings.
- Pick Your Plants – Now it’s time to head over to Ken Matthews Garden Center and pick out your plants! Annuals, perennials, herbs and veggies can all be planted as starter plants or as seeds (for our guide to seed starting, click here).
- Plant – Before you start digging, plan the layout. Plants that grow taller should be planted where they won’t cast a shadow over lower growing plants. Some vegetables don’t do well when planted close to certain varieties (for our list of compatible and combative plants, click here). Once you have a place for each of your plants, dig shallow bowls to allow for root development. Loosen the roots as much as possible and set your plant in the hole, leaving the top portion of the roots exposed above the soil line (about half an inch). Back fill soil around the roots and water thoroughly. Set up any supports, like tomato cages or stakes, now.
- Watering – Most plants need approximately 1” of water a week and during the summer your plants will need more attention. Use a water wand to water deeply around the root system and a rain gauge help you keep track of the rainfall so you can know when your plants need to be watered. Avoid wetting the foliage of your plants as wet leaves are the perfect breeding ground for fungus and bacteria.
- Fertilizing – Fertilize at the time of planting with Fox Farm Tomato and Vegetable Fertilizer or Fox Farm All Purpose Fertilizer.
- Insects and Disease – Insects and disease will happen, but daily monitoring of your plants and swift action when a problem is discovered will prevent small pest problems from becoming big problems. Bonide Neem Oil is an organic control that works on insects, mites and disease, making it a must have for gardeners.
- Harvesting – Daily monitoring is also the best way to know when your plants are ready for harvest. Make sure to harvest once your plants are ready so hungry critters don’t enjoy your hard work before you do. (Click here for a harvest timetable).
Additional Tips
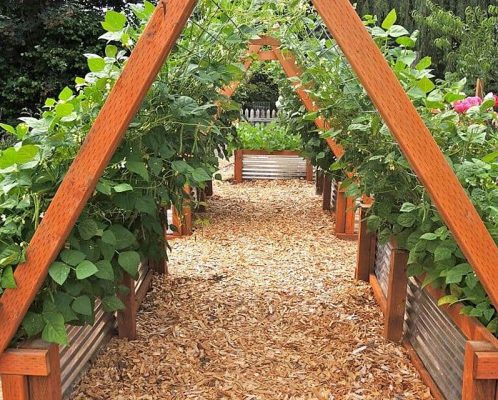
- Raised beds don’t have to be boring rectangles. Check websites like Pinterest and Instagram for idea on raised beds that are both decorative and functional! This page from The Spruce is a great place to start looking!
- Start small, it’s better to be thrilled with the results of a small garden than overwhelmed by a large one.
- Pick up necessary items like tomato cages, plants supports and fertilizers when you’re purchasing your plants as they will be needed during the planting process.
- Keep a gardening journal where you can detail all your successes (and even the failures) so you know what to replicate next year and what to avoid.
- Never (and we mean never) ever use straight top soil in your raised beds. Top soil is far too heavy and retains far too much moisture for use as a planting medium.


